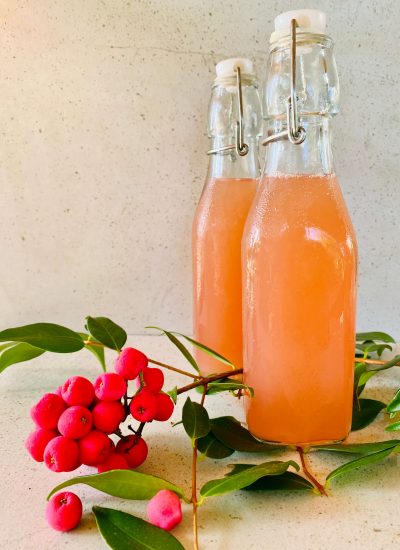
If you live in Australia, have you ever wondered what can be done with the bright pink fruit from the Lilly Pilly trees? The fruit can be eaten fresh from the tree, or used to make jam, chutney, cordial and sauces. Here is a refreshing Lilly Pilly cordial recipe adapted from a recipe by Jackie French.
Is the fruit edible from all Lilly Pilly trees?
According to the ABC’s Gardening Australia, “There are around 60 species of Lilly Pilly in Australia, and the fruits from all of them are edible, although not all of them are as palatable as others.” They suggest that, “The fruits of the Creek Lilly Pilly (Syzgium australe) are particularly tasty, as are the slightly tarter fruits of the Szygium luehmannii.”
Tips for making Lilly Pilly Cordial (refer to the recipe steps)
Step 1
Plant cells have cell walls. When the fruit is frozen these cell walls burst, thus allowing more juice and flavour to escape. This will make a more intense cordial.

Step 2
Refined white sugar is going to give this cordial more a pink colour, however, I don’t have any refined sugar in my house anymore. I experimented with honey and Rapadura sugar. For me, the honey worked well as it kept a pinkish colour and gave the cordial a beautiful honeyed flavour. The Rapadura worked well taste wise but the cordial is very brown in colour (see photo).
Tartaric acid is found in a crystallised powder form and is used to intensify the flavour and help with storage life. The lesser intense citric acid powder is easier to find in the supermarket and can be used instead. However, my research into the manufacturing process of both of these didn’t reveal anything promising as for them being a “real” food ingredient. Tartaric acid, in its natural form, is found in grape skins and citric acid is found in lemon peel. Instead of using either of the highly manufactured powdered forms of these acids, I opted to shave off the zest of one of the lemons using a vegetable peeler and added that to the mix.
Step 3
While bringing the mixture to the boil, I further released the juice and flavour by crushing most of the fruit. This could be done beforehand if the fruit is left to thaw out first.
Step 4
Sterilising the glass bottles can be done using the methods listed here. Because this cordial is stored in the fridge and has a fairly short shelf life anyway, I use the dishwasher method (without drying with paper towel) and then carefully fill the bottles with boiling water. I let them stand for a minute before emptying out the hot water while wearing an oven mit to protect my hands.
Step 5
There is no way to carefully sieve and pour the boiled cordial mixture into the bottles in one step, so this step is to mainly to sieve out the solid pieces. The finer the sieve the less cloudy the cordial will be.
Step 6
When pouring the hot liquid through the kitchen funnel and into the bottles, ensure the funnel is not held tightly down on the neck of the bottle so that the hot air can’t escape. You want the hot air to escape around the side of the funnel and not bubbling up through the hot liquid. You may need an extra set of hands to help with this step.
Step 7
Heat is the main step in preserving so it is important to not let the mixture cool before bottling it. Most preserving also uses lots of sugar or lots of salt and because this cordial doesn’t have a lot of either, it needs to be kept in the refrigerator and used within a month. If it starts to get fizzy or have a sour taste then discard it.
Contact with air can also hasten the fermentation process that we don’t want here. This is why I prefer to store the cordial in lots of smaller bottles rather than one or two big ones. I also often give a couple of bottles away to friends, family, and neighbours. They are always appreciated.

